Showing posts with label no-sew craft. Show all posts

Thursday, September 17, 2009

No-sew Fabric-covered box

Being my frugal self, I tend to store toys in cardboard boxes. They work great, but aren’t terribly attractive. Here are the results of a recent attempt to beautify the playroom. If you want to be super-thrifty, use a water-soluble glue so you can peel off, wash, and re-use the fabric once the box wears out. I can guarantee that I’ll at least consider doing that…

MATERIALS:

  • Cardboard box
  • Fabric
  • Craft glue
  • Duct tape (optional)
  • Scissors to cut fabric
  • sharp knife or exacto blade

Steps:

1) Cut flaps off of box.

20090915_1306

2) Figure out how much fabric you need to cover the outside and inside of box and cut two pieces – one for the outside and another for the inside. The fabric should overlap each edge 1-2 inches.

20090915_1307 

3) Put craft glue on bottom of box.

20090915_1308

4) Center fabric on inside of box and press into glue. Add glue to top inside edges of box.

20090915_1309 

5) Attach fabric. You could trim the corners before this step, but then you risk fabric fraying. We left ours intact, which is why it bunches a bit in each corner. I think it looks good that way, but this might bother a perfectionist.

20090915_1310

6) Secure liner fabric to the outside of the box either with craft glue or duct tape. We used duct tape (I love duct tape), but failed to get a picture thanks to “must remove duct tape from all surfaces” Johnny.

7) Center the piece of fabric for the outside of the box. If you want you can glue the fabric to the bottom; we skipped this step but it might help keep the fabric in place.

8) glue outside fabric to the inside of the box, tucking under the edges to prevent fraying. Glue the sides first, and then fold in the extra fabric on the ends before gluing the edges. Any extra fabric that you don’t catch this way can be tucked in after gluing.

20090915_1323

9) Add toys. Or three-year-olds.

20090915_1326 

These boxes would be even easier to make if you skipped the craft glue and went straight to duct tape. I didn’t do this because 1) we only have the traditional silver duct tape and none of the pretty colored stuff and 2) for some reason Johnny has an irresistible urge to remove duct tape from surfaces. Maybe it’s the challenge of peeling it off?

Monday, June 29, 2009

Yarn prints

MATERIALS:

  • Paper
  • Yarn or string
  • Tempera paint
  • Phone book

This is another craft that Emma found in this French craft book. It’s quite simple.

STEPS:

1) Place a sheet of paper in an old phone book, coat the yarn or string (except one end) in paint, and arrange the yarn on the sheet of paper, leaving the end hanging out:

20090624_10522) Place a second sheet of paper on top and close the phone book:

20090624_10533) Remove the string, pressing down on the phone book

4) Open phone book, retrieve papers, and lay out to dry

RESULTS:

We made three different prints using slight variations to this technique.

Here is the first print, which was done with a lot of paint on the yarn and pressing down quite firmly on the phone book:

20090628_1067

A second print with a moderate amount of paint, done closing the book and then re-opening and separating the pages before removing the yarn:

20090628_1069 A third print made with the least amount of paint and pressing only lightly on the phone book while removing the yarn:

20090628_1070 The third technique is the one recommended by the book, and I think I do like the effect best.

Emma enjoyed this activity and it created minimal mess, but she wasn’t interested in making more than three prints. I think it is something we’ll try again, though, and I’d like to turn the prints we have into cards. I also think this could be a good activity for introducing the concept of mirror images.

Thursday, April 30, 2009

Another peg doll

20090429_0552

See the face? She tried faces on the first two and wasn’t happy with them (I think her fingers slipped or something so they didn’t turn out as she had envisioned them), but the third time was the charm.

Emma’s fine motor skills always amaze me. And they balance out her gross motor skills - she didn’t learn to climb until Johnny (nearly 22 months younger and king of gross motor skills) taught her how, and she mastered jumping this month after over a year of trying. Funny how kids are so different within a single family…

I definitely need to get this girl some colored sharpies (to be used exclusively under supervision during Johnny’s naps). And a few more peg dolls – maybe we’ll find some other 3D objects for her to let her imagination go wild with also. If I’m feeling ambitious, we may try some fabric scrap clothing for the peg dolls as seen in this post at ikat bag – I’m guessing Emma would love that!

Tuesday, April 21, 2009

Peg doll and recyclables dollhouse

I bought these peg dolls for Emma quite a while ago, and today she asked to get them out and decorate them. I think they turned out quite nicely, especially given that it’s her first go at decorating a 3D object. I need to get her some non-smudging pens for this type of work, ideally in a range of colors instead of just black. Any suggestions as to what I should look for?

20090420_0500The dolls needed a house, so we took the lid of a shoebox and some scraps of cardboard and fabric and created this humble abode:

20090420_0503

Emma loved this activity, and it was made completely from leftover scraps apart from the two dolls (99 cents for a package of two, and I think I got them 40% off). She spent at least an hour playing with the finished product this afternoon. Maybe we should take a second shoebox lid and build an addition onto the dollhouse. :)

20090420_0502

Sunday, March 8, 2009

Play food to last (for a while, at least)

20090304_0010

You may recognize this food from my restaurant play post a couple months ago. The food was printed from Filth Wizardry. My kids used our first set until it literally fell to shreds, so we made a second set this week, laminating it this time. I don’t have a laminator, but I bought a roll of laminate that works well for small projects like this. I’ve seen other bloggers use clear packing tape to produce a similar effect.

Both kids love their new laminated food. The food is pretty small, so we store it in an old yogurt container. Emma uses it with her play kitchen as well as with the restaurant play mat!

Thursday, March 5, 2009

Geometric Shapes Truck

Here is our latest Geometric Shapes felt board activity. The shapes for this truck are the same as those used for the geometric shapes train and the geometric shapes castle. My plan is to make an entire collection for my daughter (and eventually son and second daughter once she arrives and grows up a little) to build and rebuild on their felt board (see instructions for a felt/flannel board here and here). Here is the pattern for this one:


And here is the finished product:

20090305_0001


This truck was especially popular with Johnny, who made many truck noises before destroying it. Emma can build it by putting the pieces on top of the pattern paper, and then looking at this picture or at a second truck built by me to see where the small circles and square go.

While we’re on the subject of geometric shapes and felt boards, check out the awesome artwork one of Emma’s friends made for her using the shapes from the geometric shapes train (the pieces are glued onto a piece of glitter felt):


20090222_0161

Friday, January 30, 2009

Goals and a Tutu

At the beginning of this year I posted some goals for the year. I also wanted to set some small, easily-attainable goals for each month. For January, I decided to make a tutu for my daughter Emma’s third birthday next month. I had heard tutus are easy to make, but I’d never done it.

Here’s the finished tutu, made using this excellent tutorial from Vermillion Rules.

20090125_0282

I didn’t actually follow the tutorial exactly since I wasn’t sure Emma would wear a super-full tutu (she doesn’t like layers as a general rule), but it was an excellent resource, answering every question I had from where to buy tulle to different types of tulle to use. I bought the kind that comes in 6” rolls, which requires less cutting.

As for my other goals, let’s see how I’m doing…

  • Find places to keep all those odds and ends that get stashed in random places: I’ve started on this, but there are still plenty of homeless odds and ends lying around the house.
  • Potty train Emma: No progress whatsoever. Any suggestions for motivating a completely unmotivated child to potty train? I don’t want three kids in diapers this summer!
  • Get Johnny to eat more solid food: He’ll eat sweet food now (fruit and yogurt) and the occasional bite of whatever we’re having…
  • Be more patient with cooking/baking that involves a rolling pin: Haven’t touched a rolling pin all month. In fact, I took away my kids’ play rolling pin because they were throwing it around and (being wood) it’s heavy enough to do some real damage. 
  • Take the kids outdoors more: I took them both out once. Emma’s been out with Mike a few times. It’s been very cold here all month.
  • Get the kids to sleep through the night better (closer to achieving this with Johnny than Emma, unfortunately): Emma is sleeping about the same, but going to bed without making a fuss. Johnny woke up every ten minutes last night, but I think that’s because he wasn’t feeling great. I sure hope it’s not a new habit he’s starting!
  • Thursday, January 29, 2009

    Geometric Shapes Castle


    This castle can be made using the same shapes from the Geometric Shapes Train.

    Wednesday, January 28, 2009

    Cardboard Box Washer/Dryer

    20090126_0288

    Emma’s been asking for a play washer/dryer for some time, so when I saw this booster seat box I knew exactly what to use it for.

    I took the box apart and built it again wrong side out, so that the kids would have plenty of space for decorating. We made a door by tracing a saucer and then cutting with a kitchen knife.

    Both kids had a blast decorating the box. I added some triangle, square, and circle buttons in different colors (at Emma’s request).

    20090126_0290

    Emma is thrilled with her new washer/dryer – she couldn’t wait to tell Mike about it when he got home. Johnny seems to think it’s pretty cool too.

    20090126_0292

    Wednesday, January 14, 2009

    Royal velvet

    20090109_008020090109_0079


    20090109_0085
    20090109_0074

    These crowns may not really be made from velvet, but my kids think they are awesome and they were very simple to make. Johnny’s crown used four pipe cleaners, two of each color. Emma’s crown used an extra pink pipe cleaner for the tiara effect, and I kept the blue pipe cleaners above the lower pink ones instead of alternating the way I did for Johnny. These crowns hold up surprisingly well – Emma’s had hers for several weeks, and it survived plenty of abuse from Johnny before I finally made him one last Friday. Just be sure to tuck in the sharp ends of the pipe cleaners!

    Again, this is a craft that my kids needed lots of help for, but an older child could make this on their own quite easily.

    Sunday, January 11, 2009

    Freestyle art

    Although I really enjoy making crafts with my kids, I think unstructured art time is at least as important as structured crafts.

    Emma loves the new paints I got her, so I thought I’d post a couple of her recent masterpieces. They look pretty abstract to me, but she always has a detailed narration going as she paints. 20090109_0089

    20090109_0087 Yes, I did date the second picture 2008. I’m a bit sleep-deprived lately…

    Saturday, January 10, 2009

    Pipe cleaner flower

    Pipe cleaners are a wonderful crafting tool for children because of their soft, fuzzy texture and flexibility. A toddler may need quite a bit of help to complete this craft, but an elementary school student should be able to complete it with minimal help. I made this flower with Emma to fill a vase she has in her play kitchen.

    MATERIALS:

    • 3 pipe cleaners, two green and the third whatever color you want your flower to be. You can use more flower-colored pipe cleaners to make a fuller, more 3D flower.

    STEPS:

    1) Fold the first green pipe cleaner in half. Leave a loop at the top (this will be a leaf on the stem) and twist together the rest of the two ends to form the bottom half of the stem.20090109_0066
    20090109_0067

    2) Add the second green pipe cleaner, folded in half, to the final twist in the first pipe cleaner (right before your leaf loop).

    3) Twist together the second pipe cleaner, leaving some untwisted at each end to form two more leaf loops.

    20090109_0068

    20090109_0071

    4) Make four loops with your third pipe cleaner. These loops are the petals of your flower. Keep the ends of the pipe cleaner free, twisting them onto the “leaves” at the top of your stem to keep the bloom in place.

    Monday, December 29, 2008

    Geometric Shapes Train

    This craft was inspired after we made this Cut and Paste Train posted at No Time for Flash Cards.
    Both kids enjoyed building the train, so I decided to make them felt shapes for a train. Here is the design I created:
    My plan is to create a series of standard shapes made out of felt that can be used to create various scenes/pictures. Then I can just get out the shapes and design sheets and my kids can use them over and over, or create new designs of their own.

    Here is the felt train. Emma really enjoyed making it over and over, with a little help.

    Tuesday, December 16, 2008

    Beautiful Simplicity

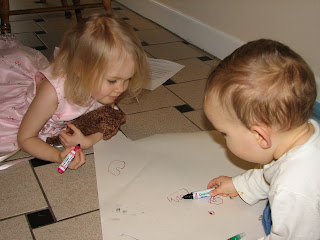
    Sometimes the best crafts are the simplest ones. I got a big roll of paper from Ikea on Saturday. The paper is designed to go on their easel, but I've just been letting my kids draw on the floor. The paper is big enough that they are happy drawing on the same sheet, which is nice since Johnny always wants to draw on whatever Emma is drawing on.
    They've made some great designs, which can also double as wrapping paper. My favorite? This bear that Emma drew - pretty good for a two-year-old, don't you think?

    Tuesday, December 9, 2008

    Geometric Shapes Nativity Scene

    I always like pictures that are made out of geometric shapes. I love the simplicity as well as the flexibility, and it's a fun way to talk with young children about different shapes and the way they fit together. This nativity scene was made using five triangles, three circles, two rectangles, one trapezoid, and one oval.

    We made this out of felt because I plan to keep the pieces and use them to build different scenes over time, but you could make it out of construction paper and glue it together that way (or glue down felt pieces) just as easily. My two-year-old is barely beginning to understand the Christmas Story, and she likes learning about it in different ways.

    This sketch shows how more clearly how the pieces go together. I actually cut it apart and used it as a pattern to create the pieces for the finished product, although if you look closely you'll notice I flipped the pieces for Mary's dress around.

    Sunday, December 7, 2008

    Handprint Christmas Tree

    MATERIALS:
    • Colored paper (green, red, and brown)
    • Scissors
    • Glue
    • Stickers (for decorations, optional)
    STEPS:

    1) Trace and cut out several handprints. I used four of my daughter's handprints and four of my son's handprints.
    2) Paste together on red paper to form a tree. Cut out a star to put on top (I traced the shape from a cookie cutter) and a brown rectangle to be the stump. You could also cut out presents from other colors of paper.
    3) Add stickers for tree decorations. My minimalist daughter chose to skip this step...

    Saturday, December 6, 2008

    Repurposing clothing: no-sew doll carrier

    My inspiration for this came from this post at mamatoto.org.

    I took an old women's swimsuit, cut off the top and bottom...
    And voila, a carrier for Emma's baby doll! Nothing fancy, but she loves it.
    Now she can care for her baby hands-free :)

    Is it as nice as a sewn doll carrier? Of course not, but it keeps my daughter happy and that's what matters!

    Friday, December 5, 2008

    Paper Snowflakes

    This is an old winter classic that is really better suited to older toddlers, although my daughter really enjoyed helping with the activity. You could involve a young toddler more by having them color the paper before it is cut into snowflakes

    Take a square sheet of paper, and fold in half

    Keep folding until it is a thing cone. Cut small tiangles out of the edges and a zig-zag top
    Hang on window or wall to enjoy
    My motive in making this craft today was actually to keep birds from crashing into our windows. A bird crashed into this window this morning, and I felt so bad. The bird actually recovered (after being stunned for about half an hour) and flew away, so at least we had a happy ending this time.

    Newest posts from my new blog